From Field to Museum: Part 1, the Field
By Andy Rich
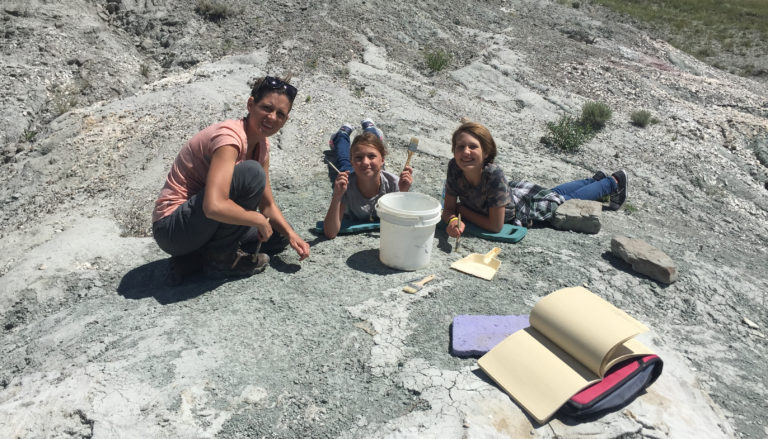
It’s a thrilling moment to find a fossil while digging. However, how do you get to that point and what do you do after? We at The Montana Dinosaur Center pride ourselves on involving the public in citizen science. In our dig programs our staff trains you in finding and excavating fossils: https://tmdinosaurcenter.org/montana-dinosaur-dig-programs/short-programs/
The first step is discovering the fossil. By using tools like awls and paint brushes we carefully break away a rock wall, bit by bit. With patience and persistence, some one will discover a fossil, when they remove a piece of rock and there’s a black/brown/maroon piece beneath. At our dig site, those are some of the colors the fossils take. The first thing you do is let people know, because everyone wants to see fossils. From there we carefully expose the fossil.
The next step is to make a field jacket. Jackets are protective shells for fossils. First we cover the fossil in a protective layer of wet paper towel. The next step is to soak burlap strips in plaster and encase the fossil and surrounding rock. Then we let it dry.
Before our last step of fossil excavation, we make sure to get GPS data of the fossil’s location. Geographic data is crucial for a future step. Once the jacket is dried and the data is recorded, we can begin flipping the jacket. We carefully cut under the fossil with chisels, moving slowly and stopping if anything seems off. Once there’s enough separation between the rock wall and the jacket, we swiftly flip the jacket over, so that the rock and fossils don’t fall out.
From there we load them into our car, pack around the jackets so they don’t move, and we head back to the museum. From there we go to the next process, lab preparation. Preparation or “prep” needs a post all its own.